IoT Training Platform / Demo Wall System
Smart Home Simulator Guides + Labs
Complete build documentation, field operation guide, and student lab library for the IoT Smart Home Demo Wall, from raw lumber to classroom-ready simulator exercises.
11
Build Resources
01
User Guide
08
Student Labs
20
Total Resources
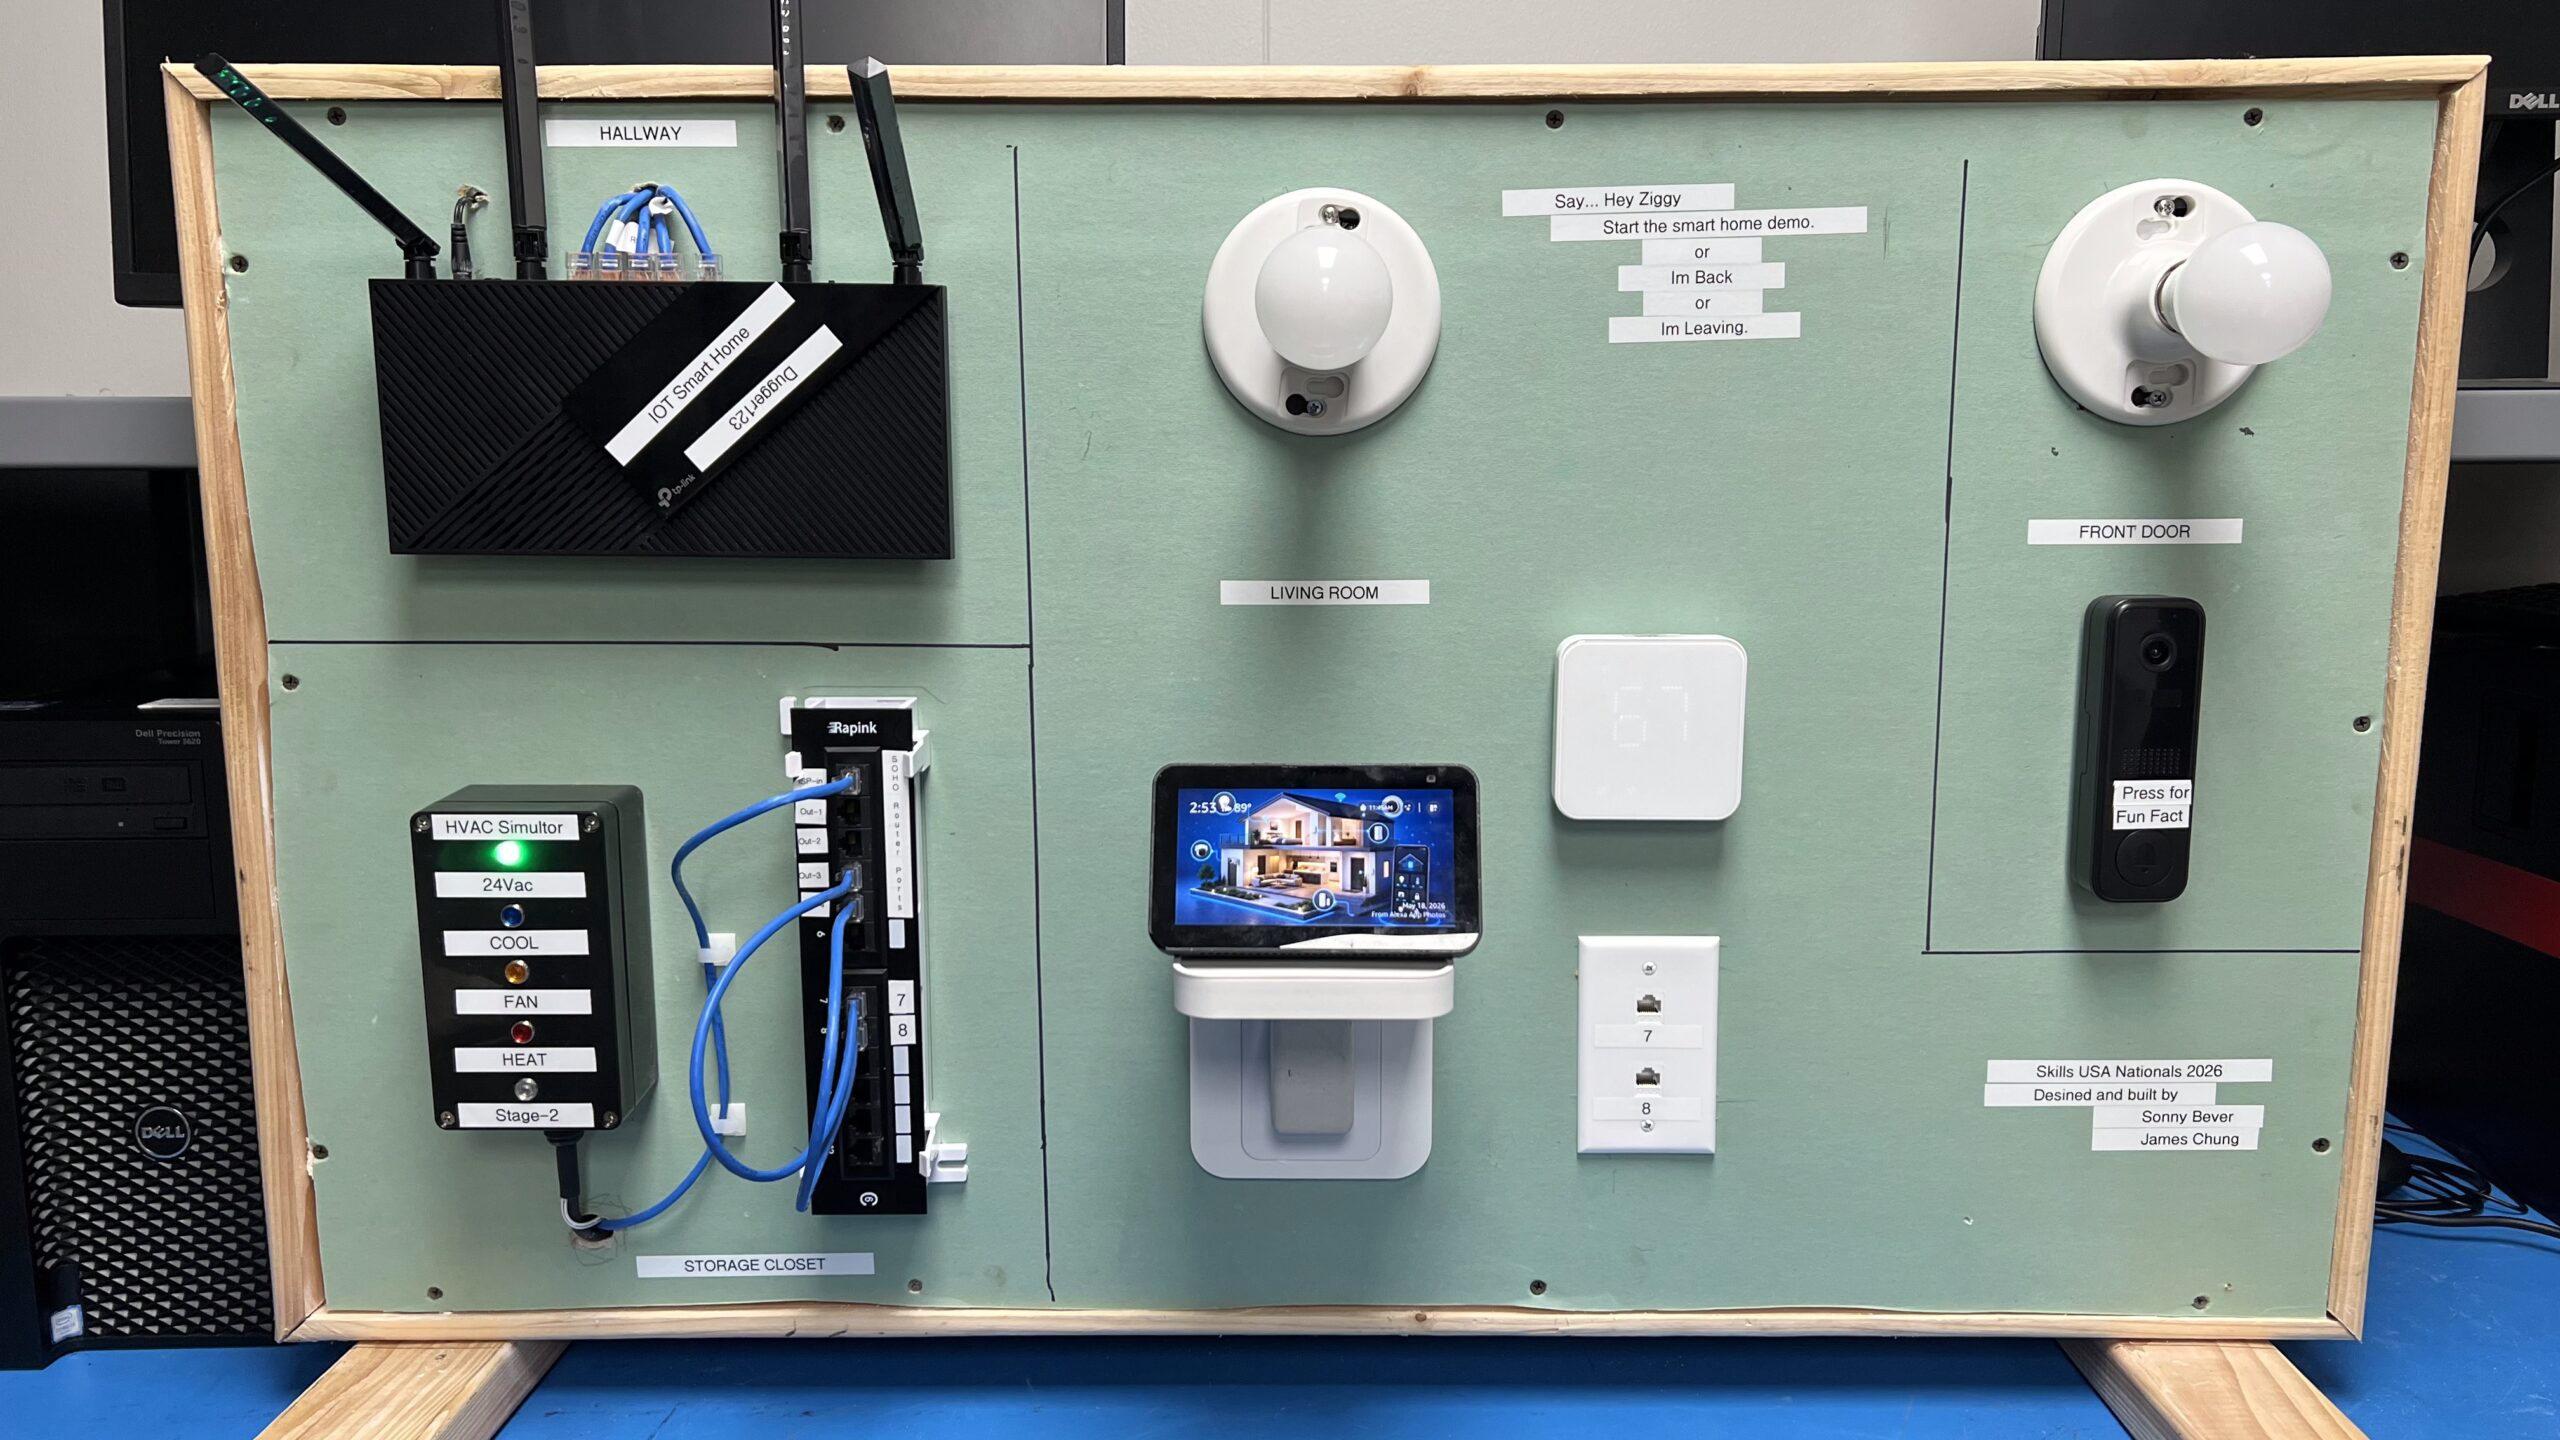
Smart devices
Auto-rotating project images
Demo Overview
Walkthrough Video
Build & demo walkthrough
YouTube — Sonny Bever
Builder Guides
Build Sequence – Phases 01-10
Recommended first download
Master Build Guide
Complete start-to-finish build manual for the IoT Smart Home Simulator, combining all 10 build phases into one printable reference for full builds, rebuilds, and instructor prep.
All 10 phases
Printable reference
Build order
Materials overview
Instructor prep
Master Guide
Open Master PDF
01
Phase 01
Build the Frame
2×4 lumber
Miter cuts
1/2″ drywall
Table saw
Construct the simulator frame, support structure, and base layout used for the demo wall.
02
Phase 02
Cut and Install Plug and Light Boxes
Outlet box
Keystone box
Light boxes
Drywall cuts
Mock up, cut, and mount the outlet box, keystone box, and round light boxes.
03
Phase 03
Wire the Plug, Light Sockets, and Power Strip
Romex
Plug adapter
Light sockets
Velcro mount
Wire the plug adapter, single outlet, two light sockets, and secure the power strip with Velcro.
04
Phase 04
Mount Router, Patch Panel, and CAT Cable
Router
Patch panel
Keystone jacks
RJ45
Punch down
Install router, patch panel, keystone jacks, RJ45 ends, punch downs, and patch cables.
05
Phase 05
Configure the Router for IoT Smart Home
Firmware update
SSID config
DHCP
IoT VLAN
Reset, update firmware, configure SSIDs, confirm DHCP, and prepare the router for simulator devices.
06
Phase 06
Add Alexa Show and Device Apps
Echo Show 5
Alexa account
Device apps
App tracking
Set up Echo Show 5, Alexa account, third-party apps, and device account tracking.
07
Phase 07
Build the HVAC Simulator
24V AC
Project box
LEDs
Power supply
Thermostat wiring
Build and install the 24V AC HVAC simulator project box, LEDs, power supply, and smart thermostat wiring.
08
Phase 08
Configure Smart Thermostat and Devices
Thermostat
Smart lights
Doorbell cam
Alexa integration
Configure the thermostat, lights, doorbell camera, Alexa integration, and final device checks.
09
Phase 09
Build Routines and Demo Scenarios
Alexa routines
Demo scripts
Reset steps
Student guide
Create Alexa routines, repeatable demo scenarios, reset steps, and student demo scripts.
10
Phase 10
Harden the Router and Network
Router security
ACL planning
DHCP inventory
Validation testing
Secure the router, SSIDs, DHCP inventory, ACL planning, validation testing, and troubleshooting.
User Guide
Field Operation
UG
Field Guide / Instructors & Demo Reps
Booth Setup and Demo Operation
Field guide for instructors or traveling demo reps: carry in, connect internet to patch panel port 1, power on, wait five minutes, test demos, shut down, and troubleshoot.
Carry-in checklist
Power-on sequence
Patch panel port 1
5-min boot wait
Demo test
Shutdown procedure
Troubleshooting
User Guide
Open User Guide PDF
Student Labs
Exercise Library – Coming Next
Use these slots for future student lab PDFs, answer keys, worksheets, and instructor notes. The library now includes smart-home operation labs plus cabling diagnostics, repair, replacement, and cable-building exercises.
Lab 01
Draft slot
Device Discovery and Pairing
Students identify simulator devices, join the IoT network, and verify each device appears in the control app.
Add Lab PDF Later
Lab 02
Draft slot
Automation Routine Build
Students create a repeatable smart-home routine using a trigger, action, test condition, and reset step.
Add Lab PDF Later
Lab 03
Draft slot
HVAC Simulator Test
Students trace thermostat wiring, trigger heat/cool/fan states, and document expected LED behavior.
Add Lab PDF Later
Lab 04
Draft slot
Network Hardening Challenge
Students review SSIDs, DHCP inventory, passwords, and access rules, then propose a secure demo configuration.
Add Lab PDF Later
Lab 05
Cabling slot
Build a New Ethernet Cable
Students cut cable to length, strip the jacket, arrange conductors to T568B, crimp RJ45 ends, and label the finished cable.
Add Lab PDF Later
Lab 06
Cabling slot
Cable Tester Diagnostics
Students use a cable tester to identify opens, shorts, split pairs, reversed pairs, and incorrect pin order.
Add Lab PDF Later
Lab 07
Cabling slot
Repair a Bad Termination
Students inspect a failed RJ45 termination, remove the bad end, re-terminate the cable, and confirm it passes testing.
Add Lab PDF Later
Lab 08
Cabling slot
Replace a Cable Run
Students trace a failed cable path, replace the run between the wall device and patch panel, then verify link lights and connectivity.
Add Lab PDF Later